Revised 2/22/21
Make sure your photo is a jpg or png file no larger than 1000 pixels on an edge. Put them in an easily found location, e.g., your desktop.
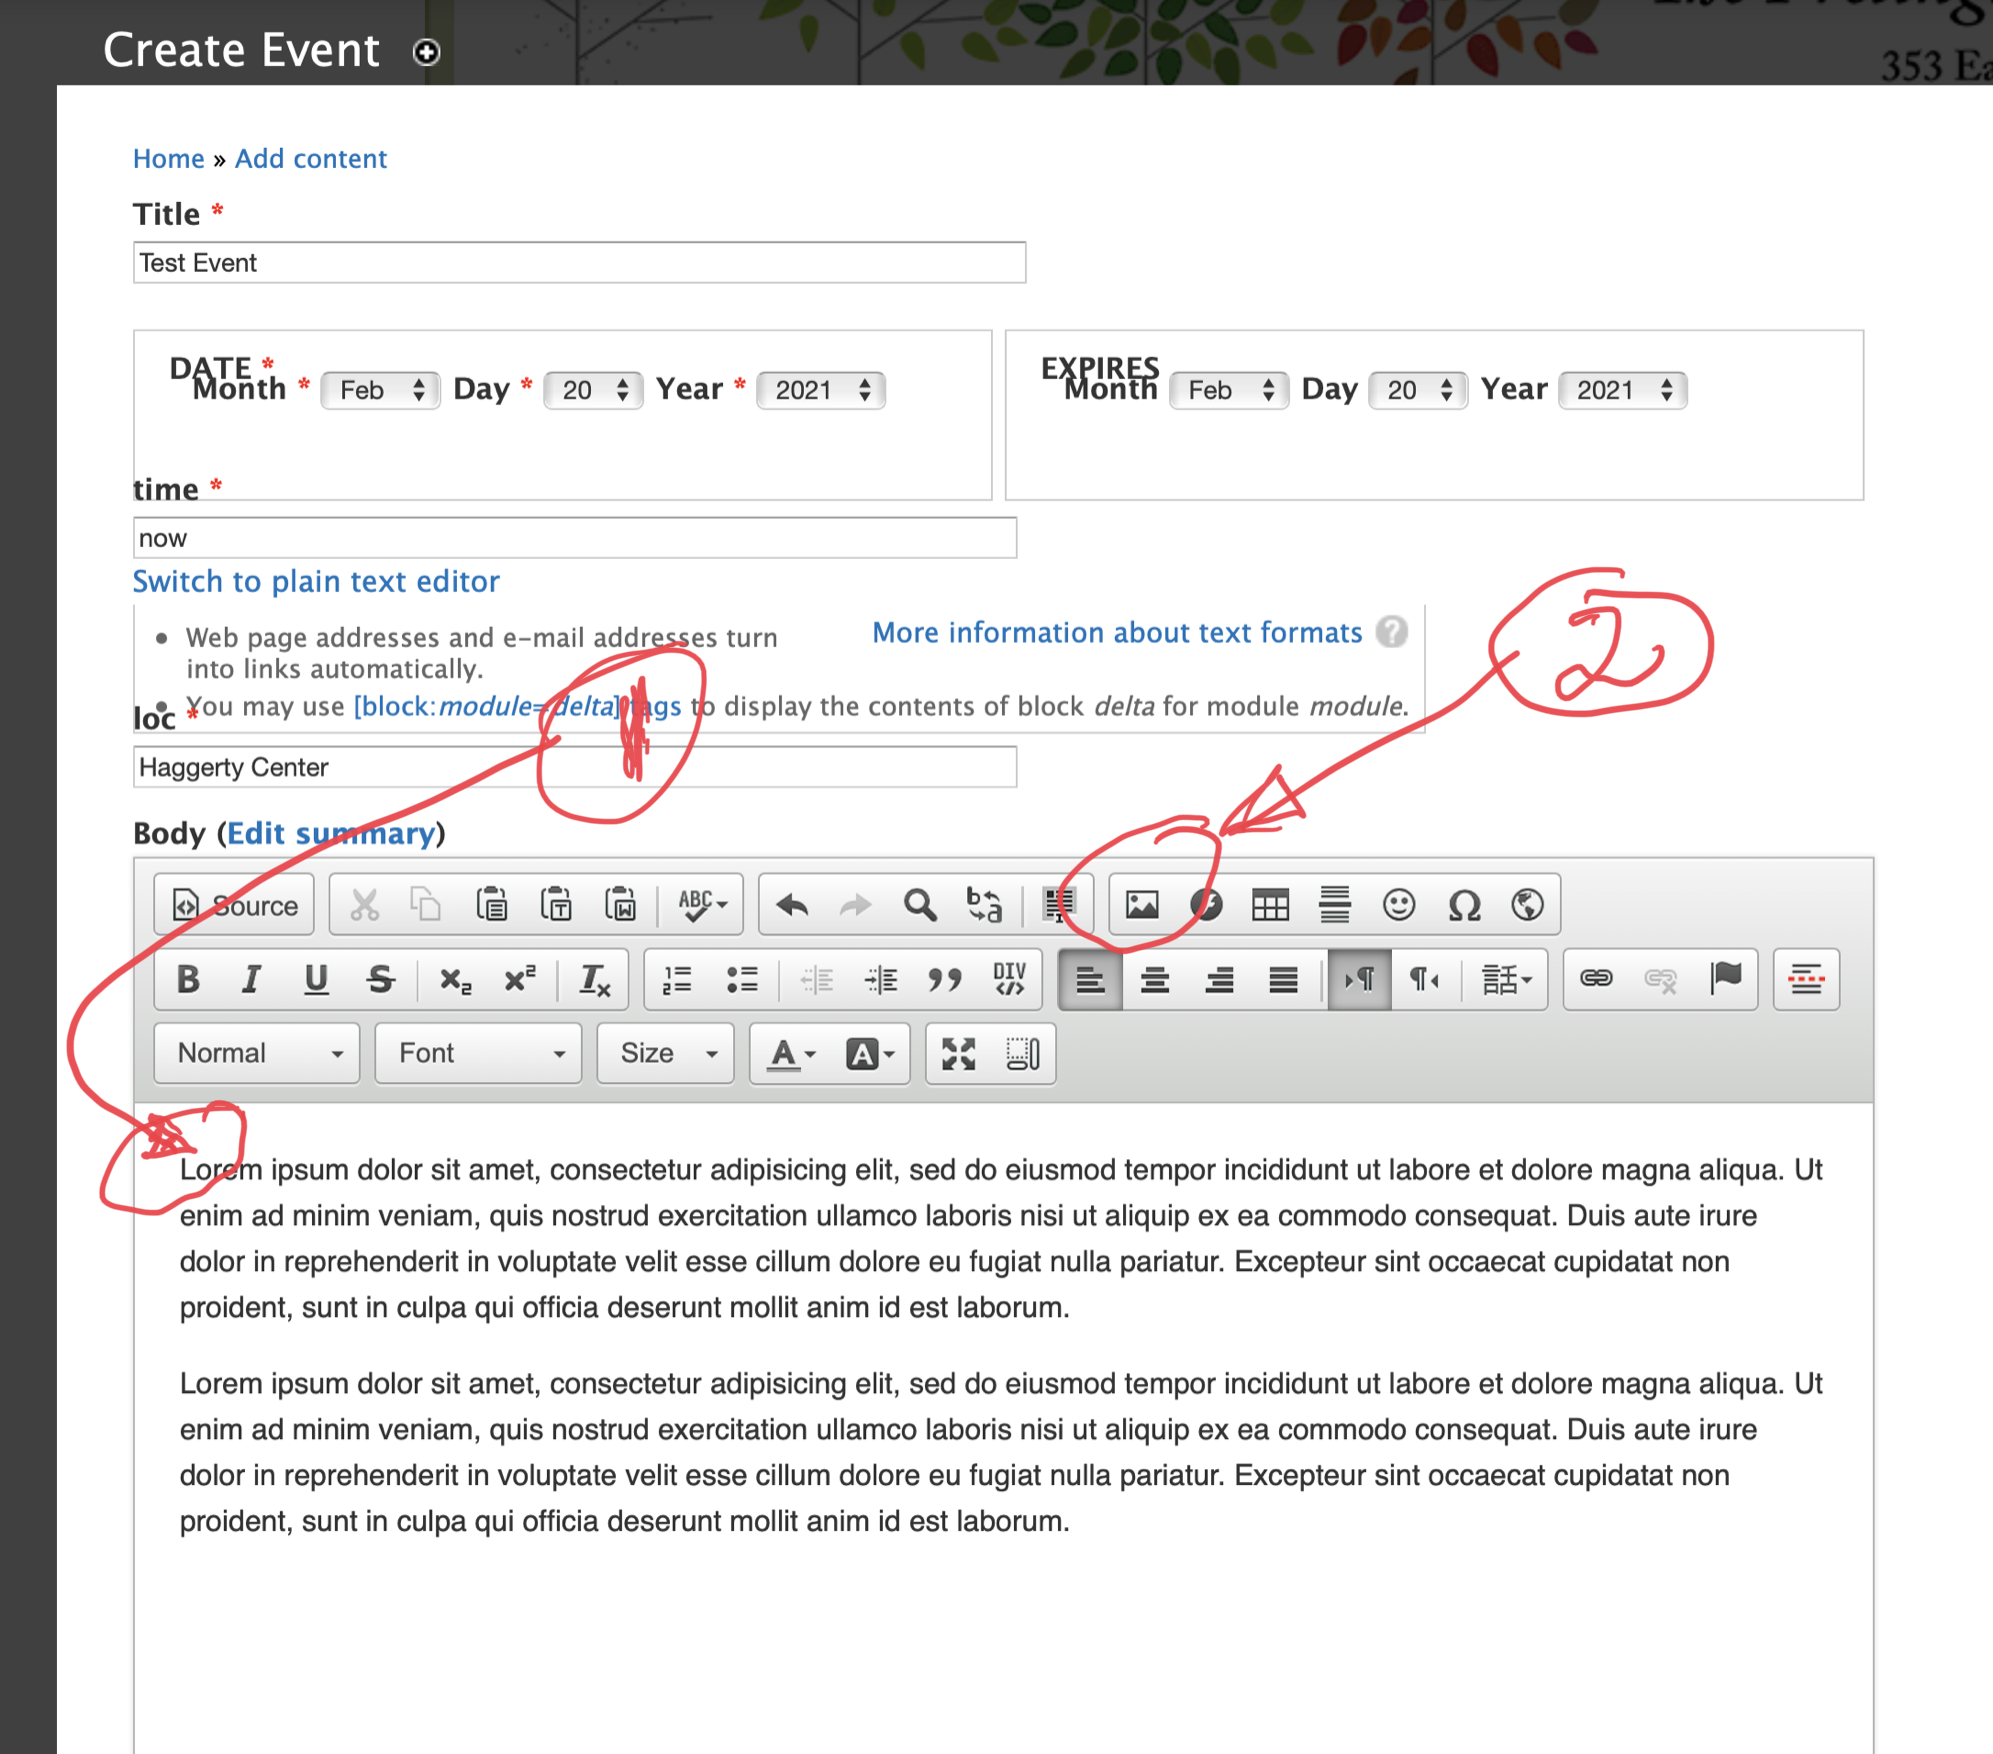
Click the “Add Event” link in the WebDev Links section and add your text. When ready, click at the beginning of the line where you want to insert the picture (#1 in screenshot) and then click the image handling button (#2).
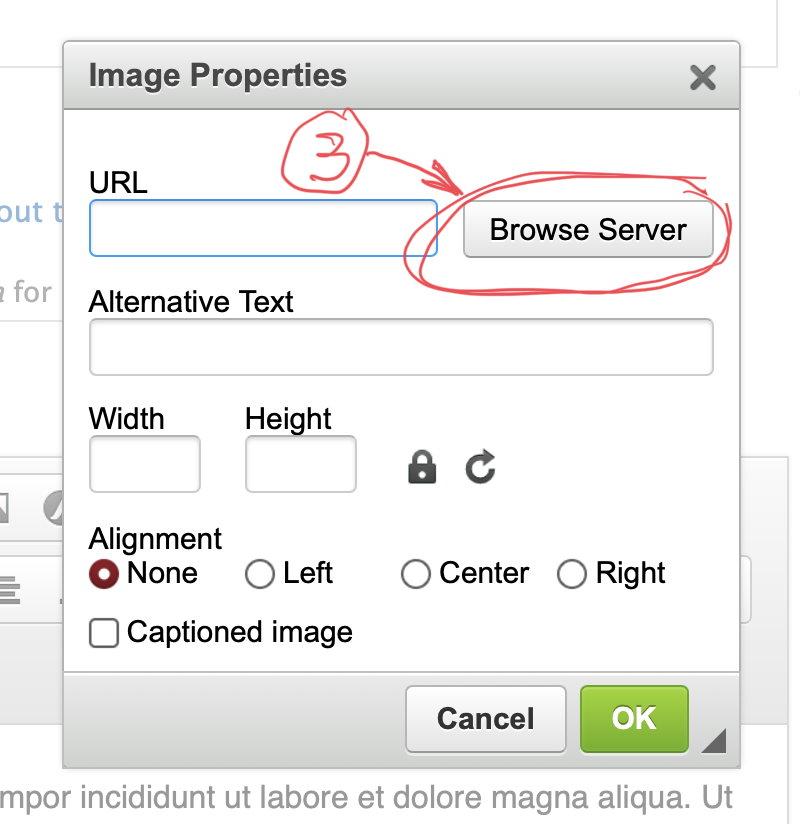
Click the “Browse Server” button (#3) to open the server’s file manager window.
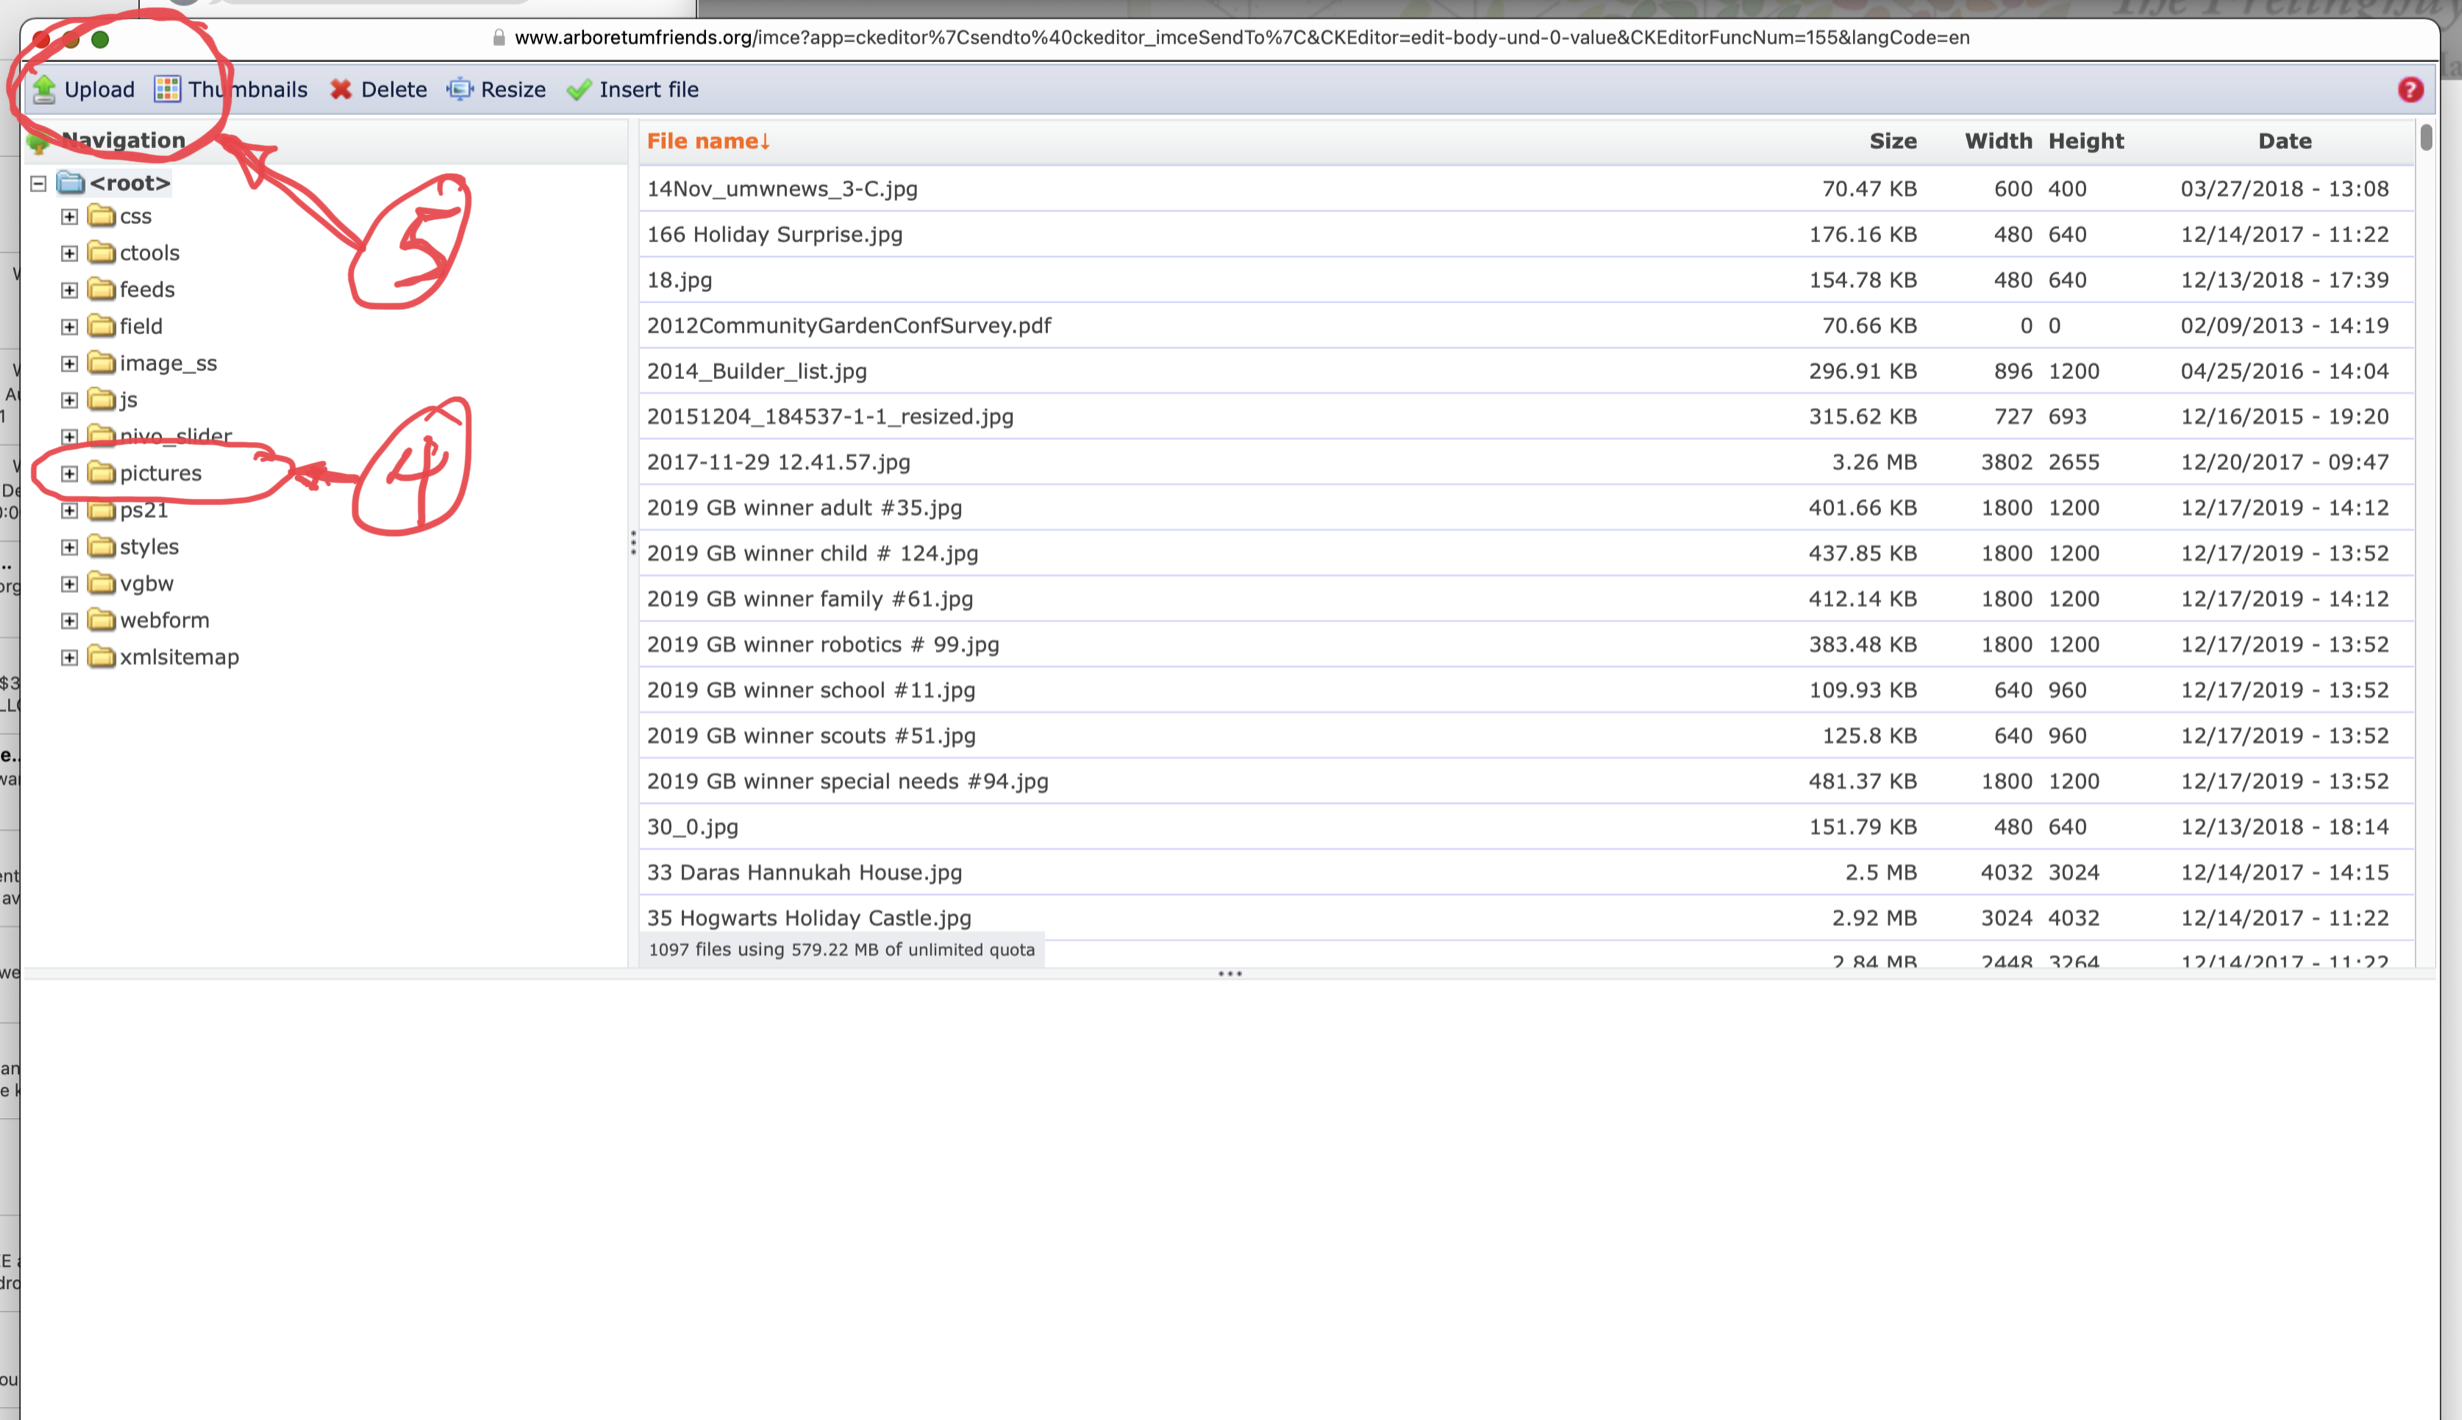
Now make sure the “Pictures” folder is highlighted (#4 – this is where you want to store the images) and then click the “Upload” button (#5).
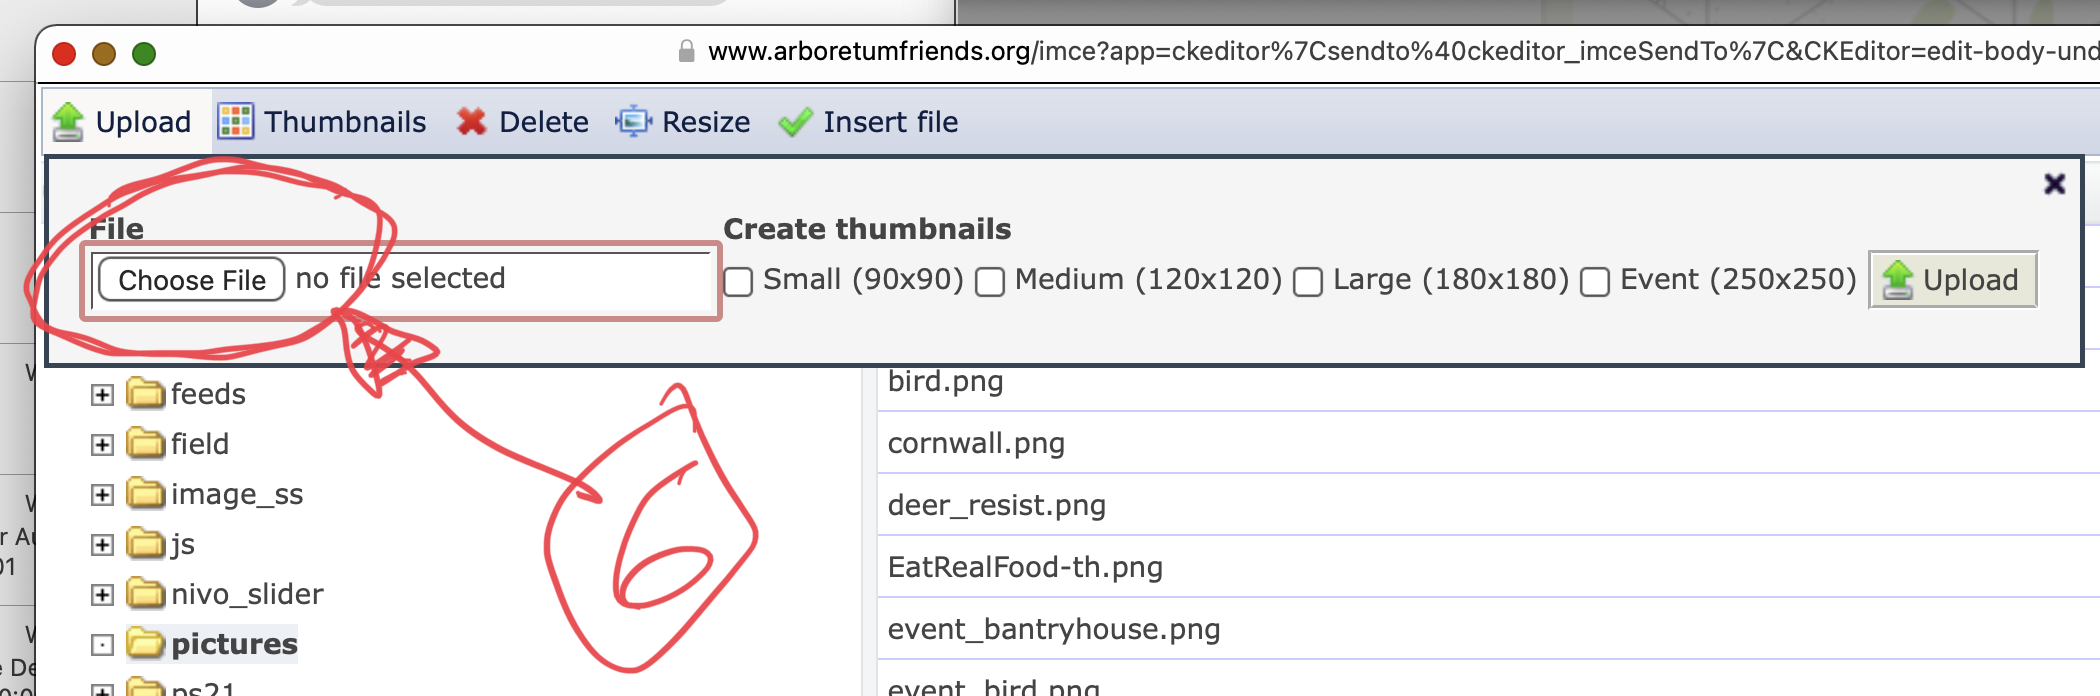
Now click “Choose file” (#6)
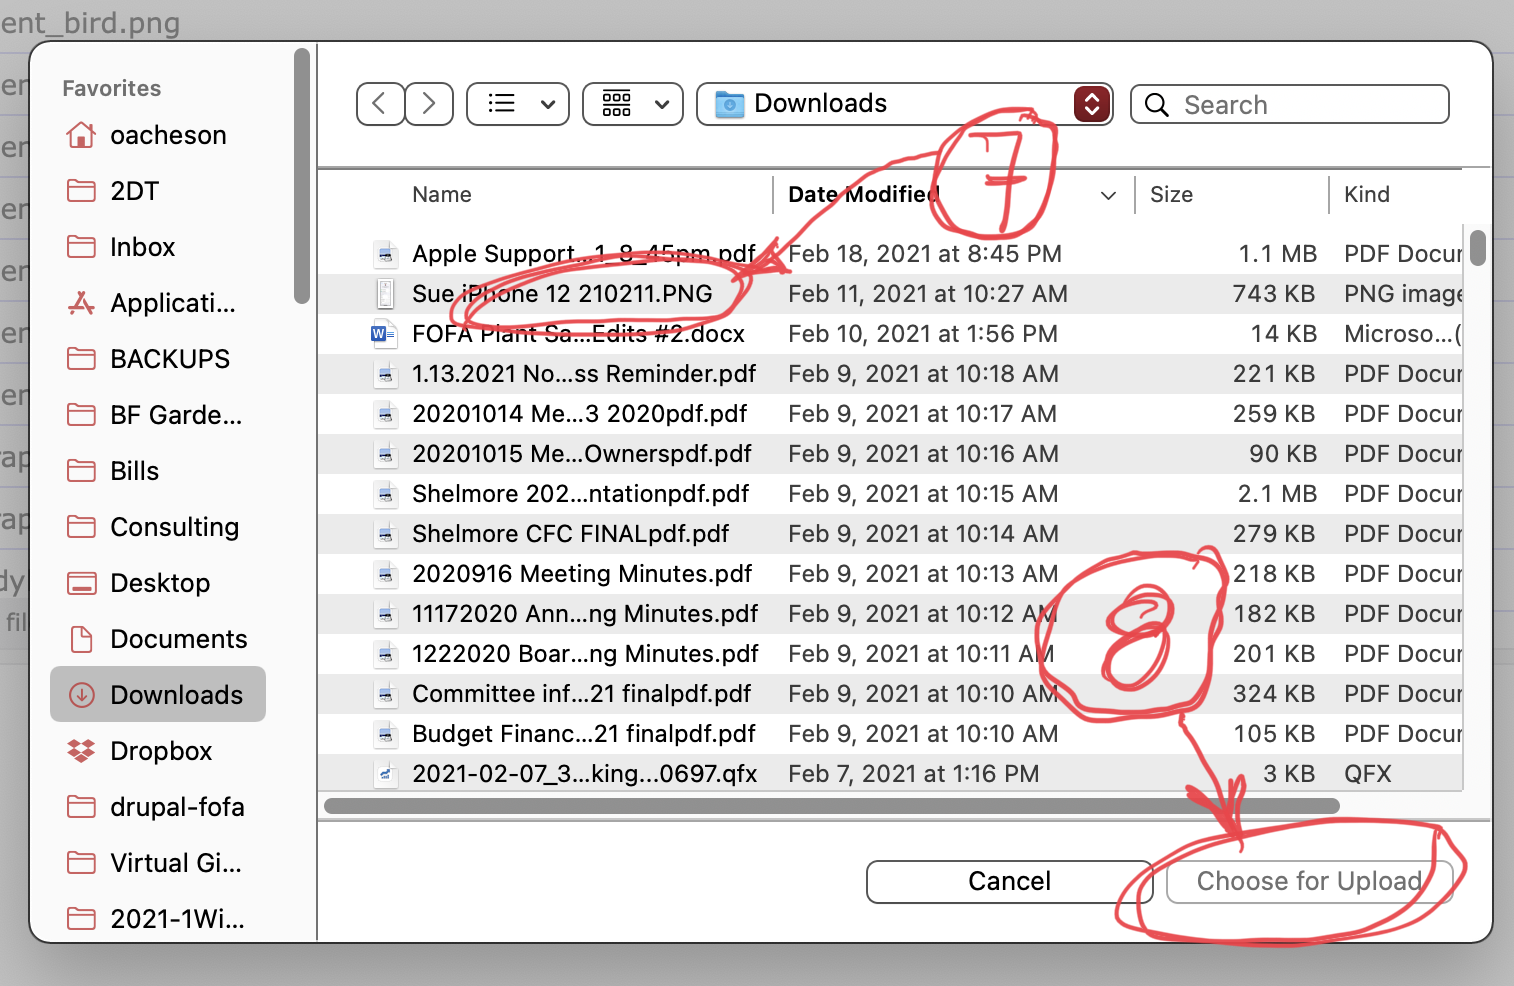
Select the file you want to upload (#7) and then click “Choose for Upload” (#8).
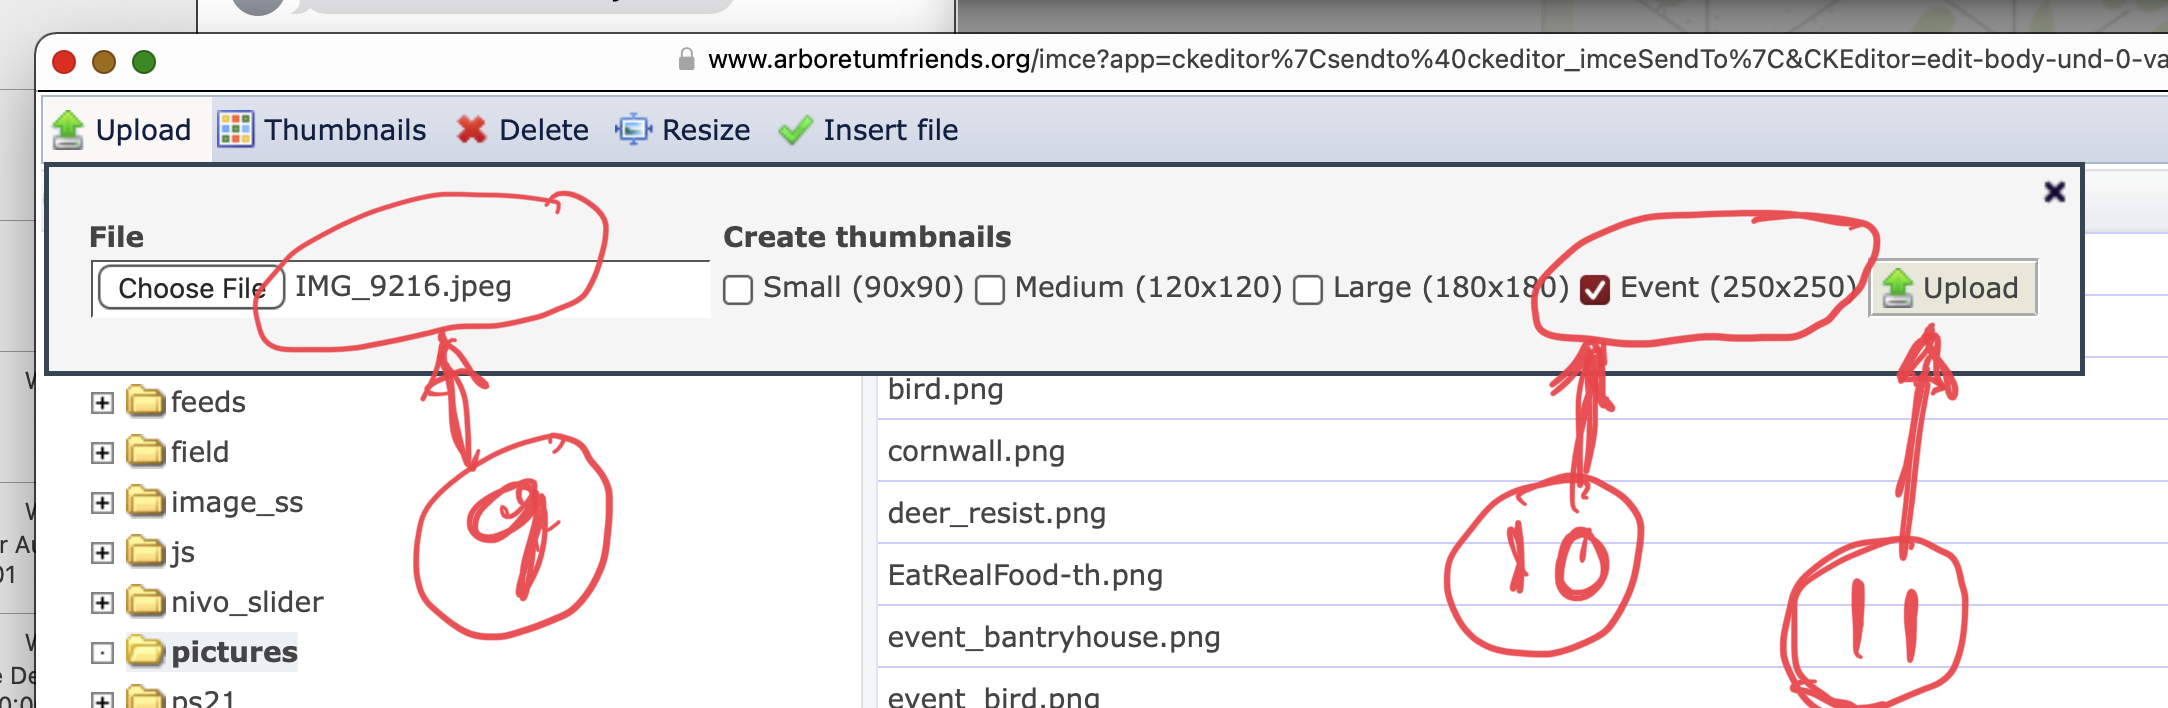
Note the name of the file you chose is in the window (#9). Check the Event (250×250) box (#10) and then click “Upload (#11). This uploads the image plus a resized copy (250×250 pixels) to the server.
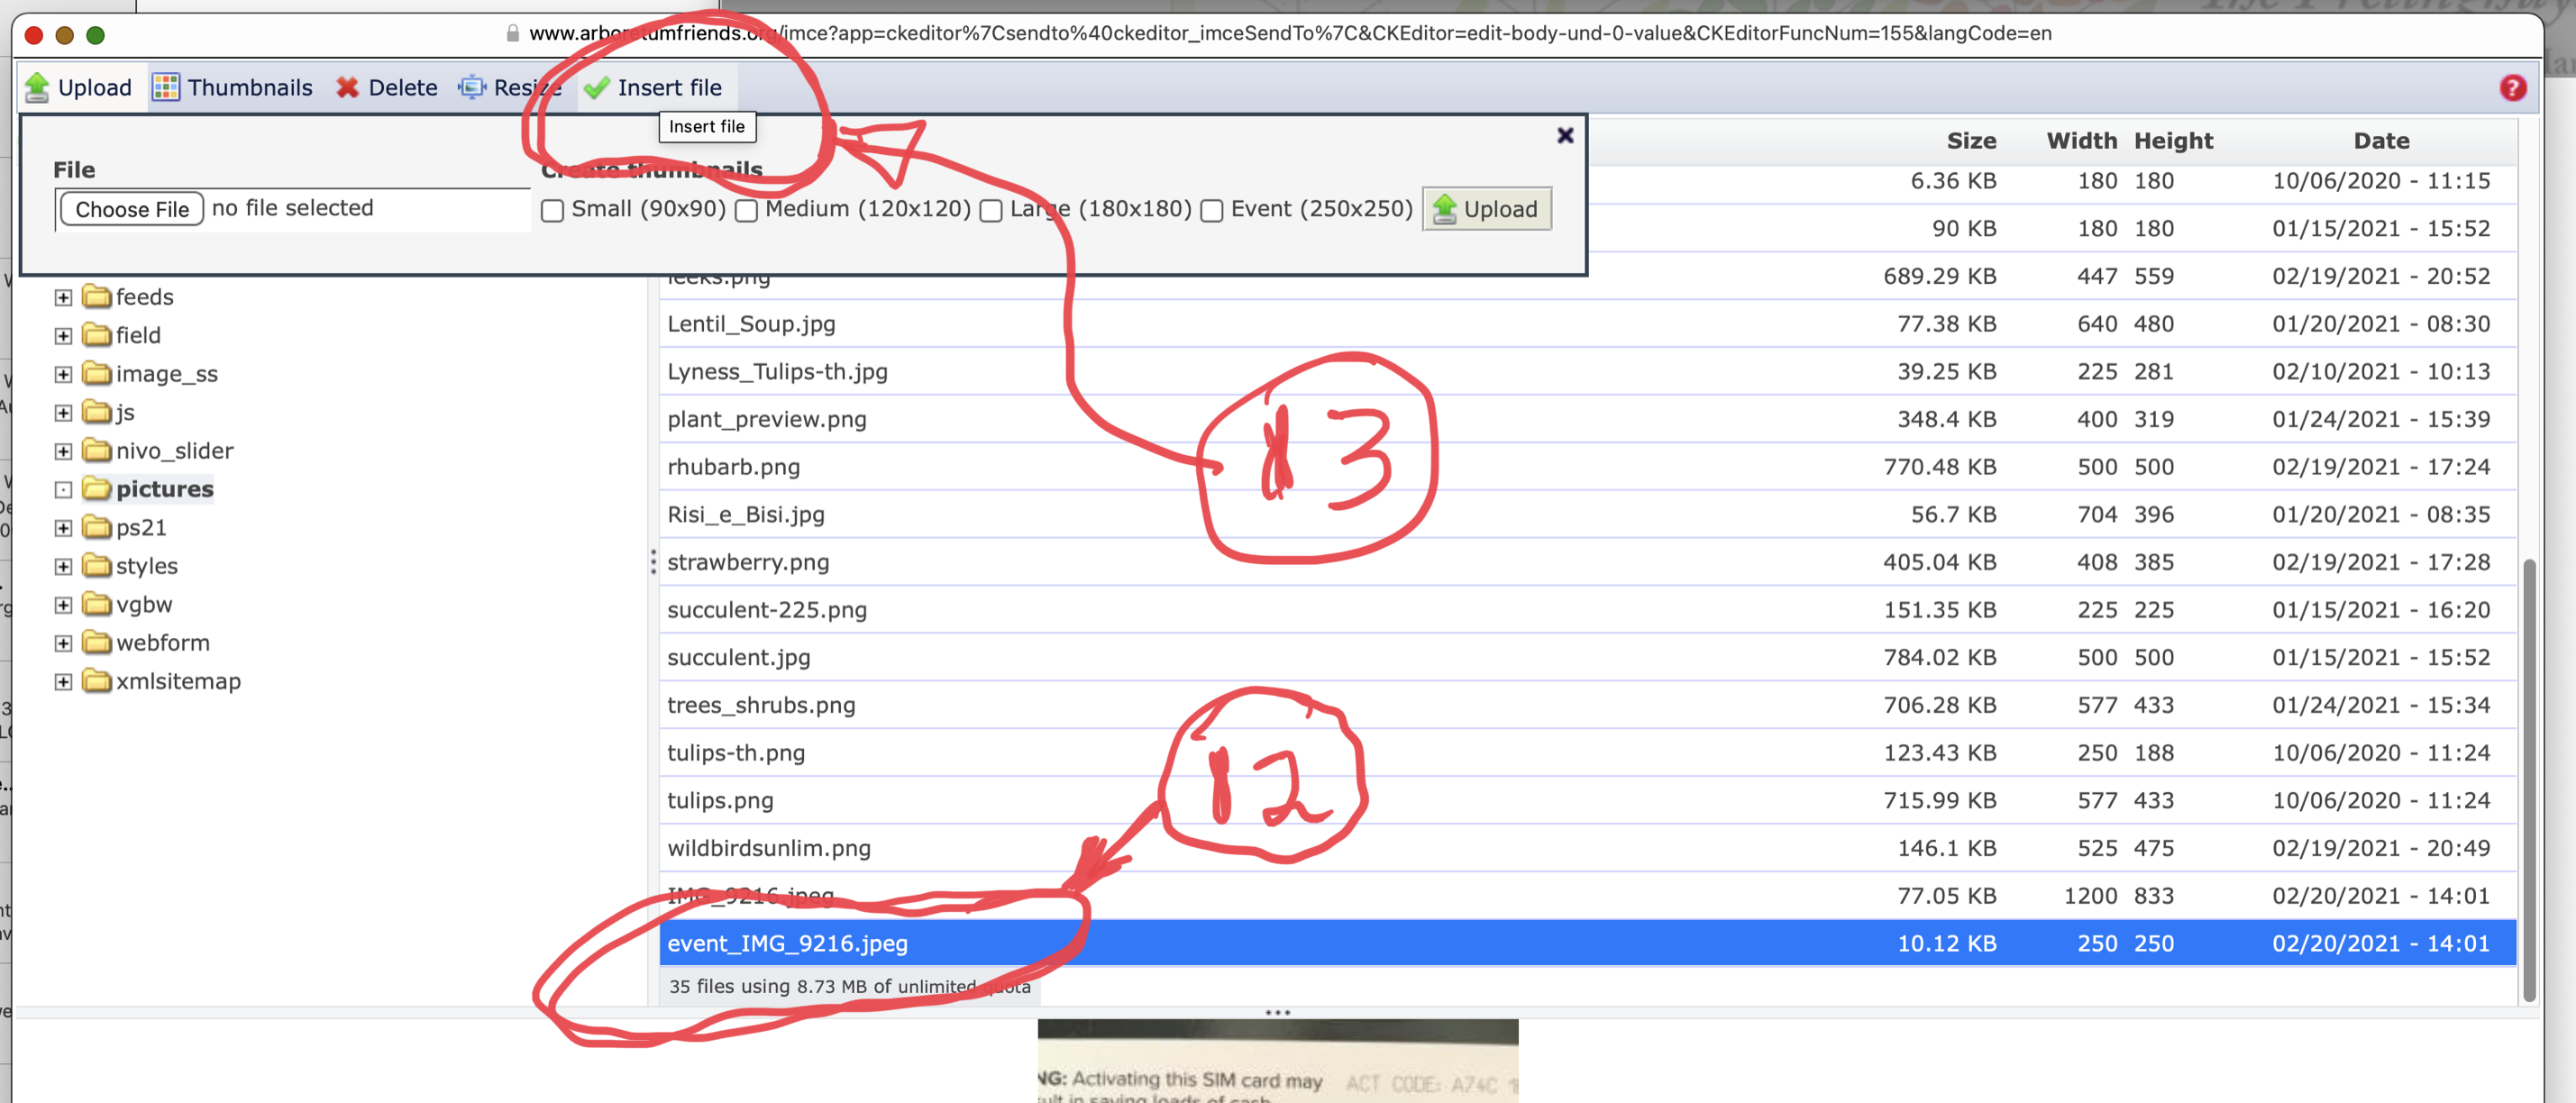
The file list now shows 2 versions of the file, the original you uploaded plus the resized version with “Event_” inserted at the beginning of the original name. Select the “Event_filename.jpg” (#12) and then click “Insert file” (#13).
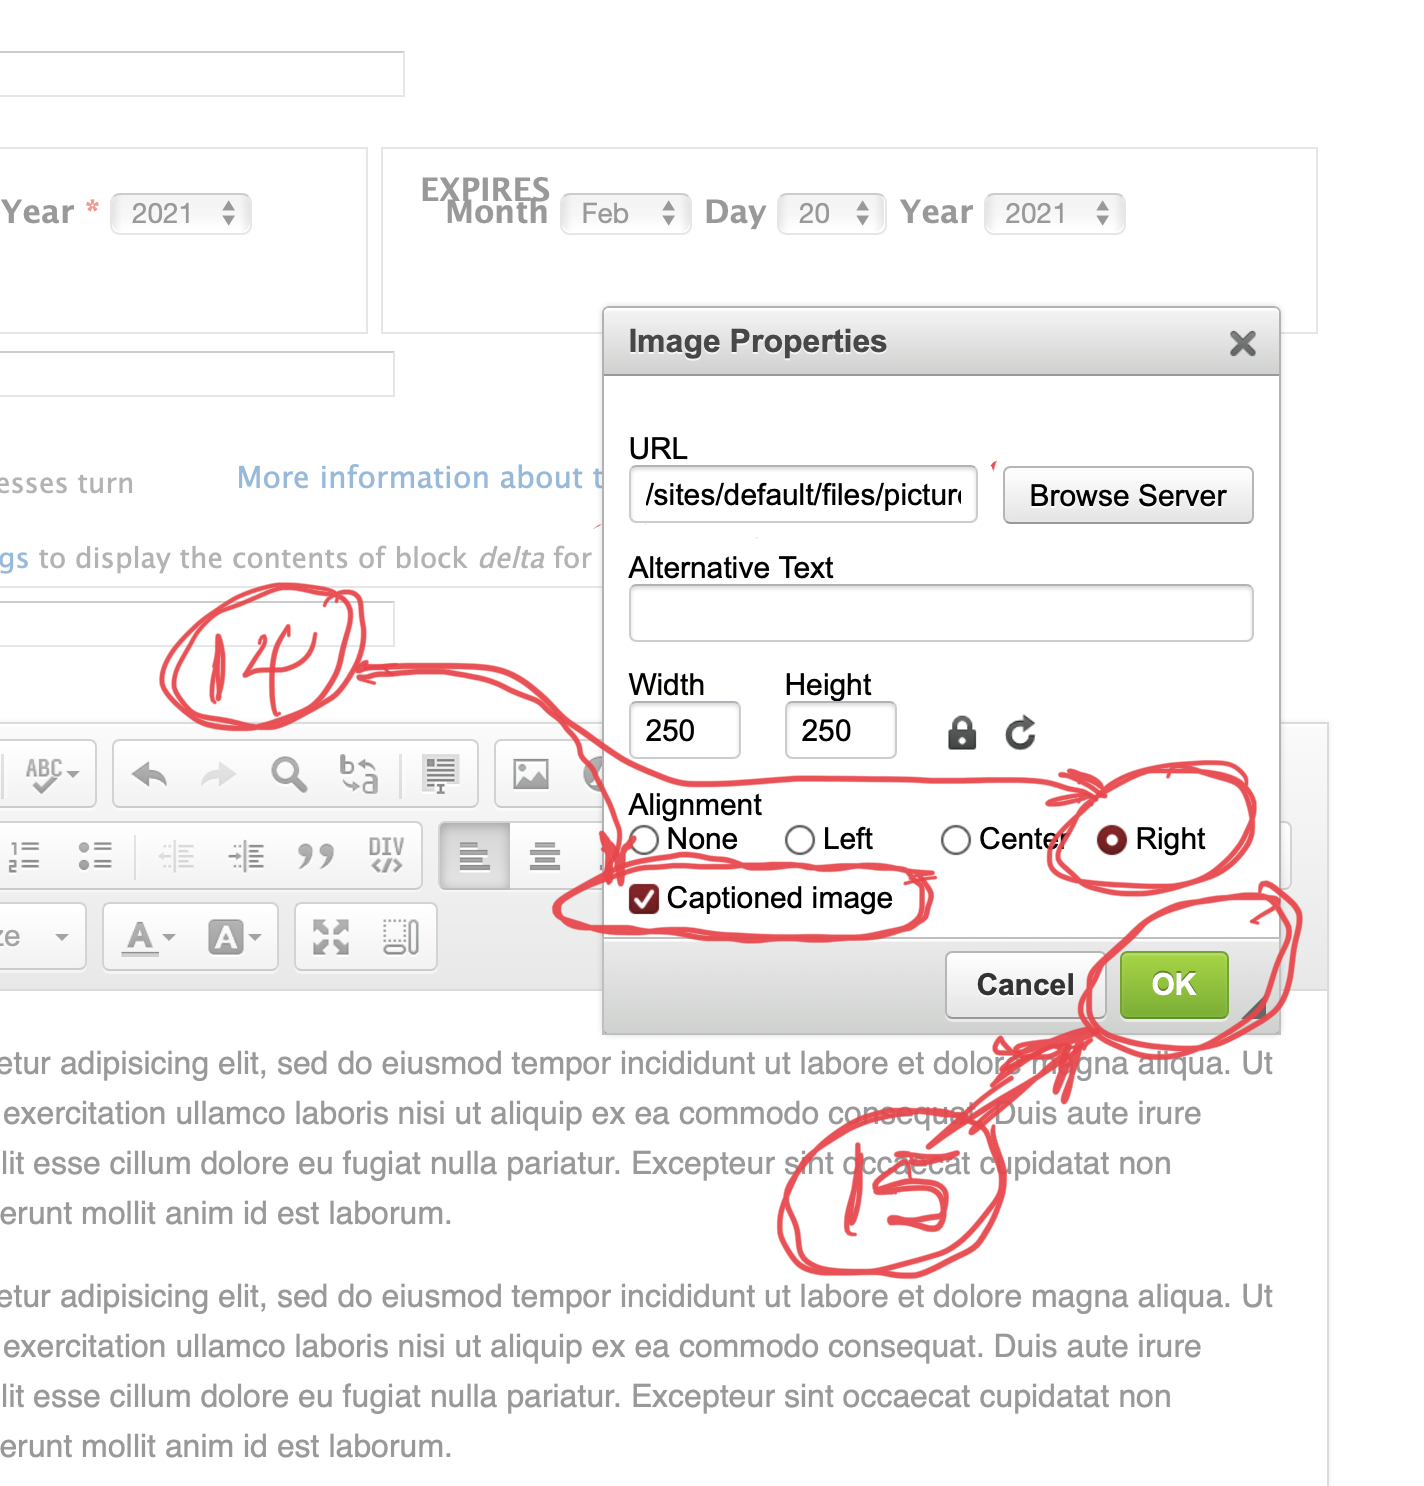
Now we are back to the Image Properties window from several steps ago, but now the URL is filled in as are the Width and Height. Check the “Alignment Right” and “Captioned image” boxes (#14) and then click “OK” (#15).
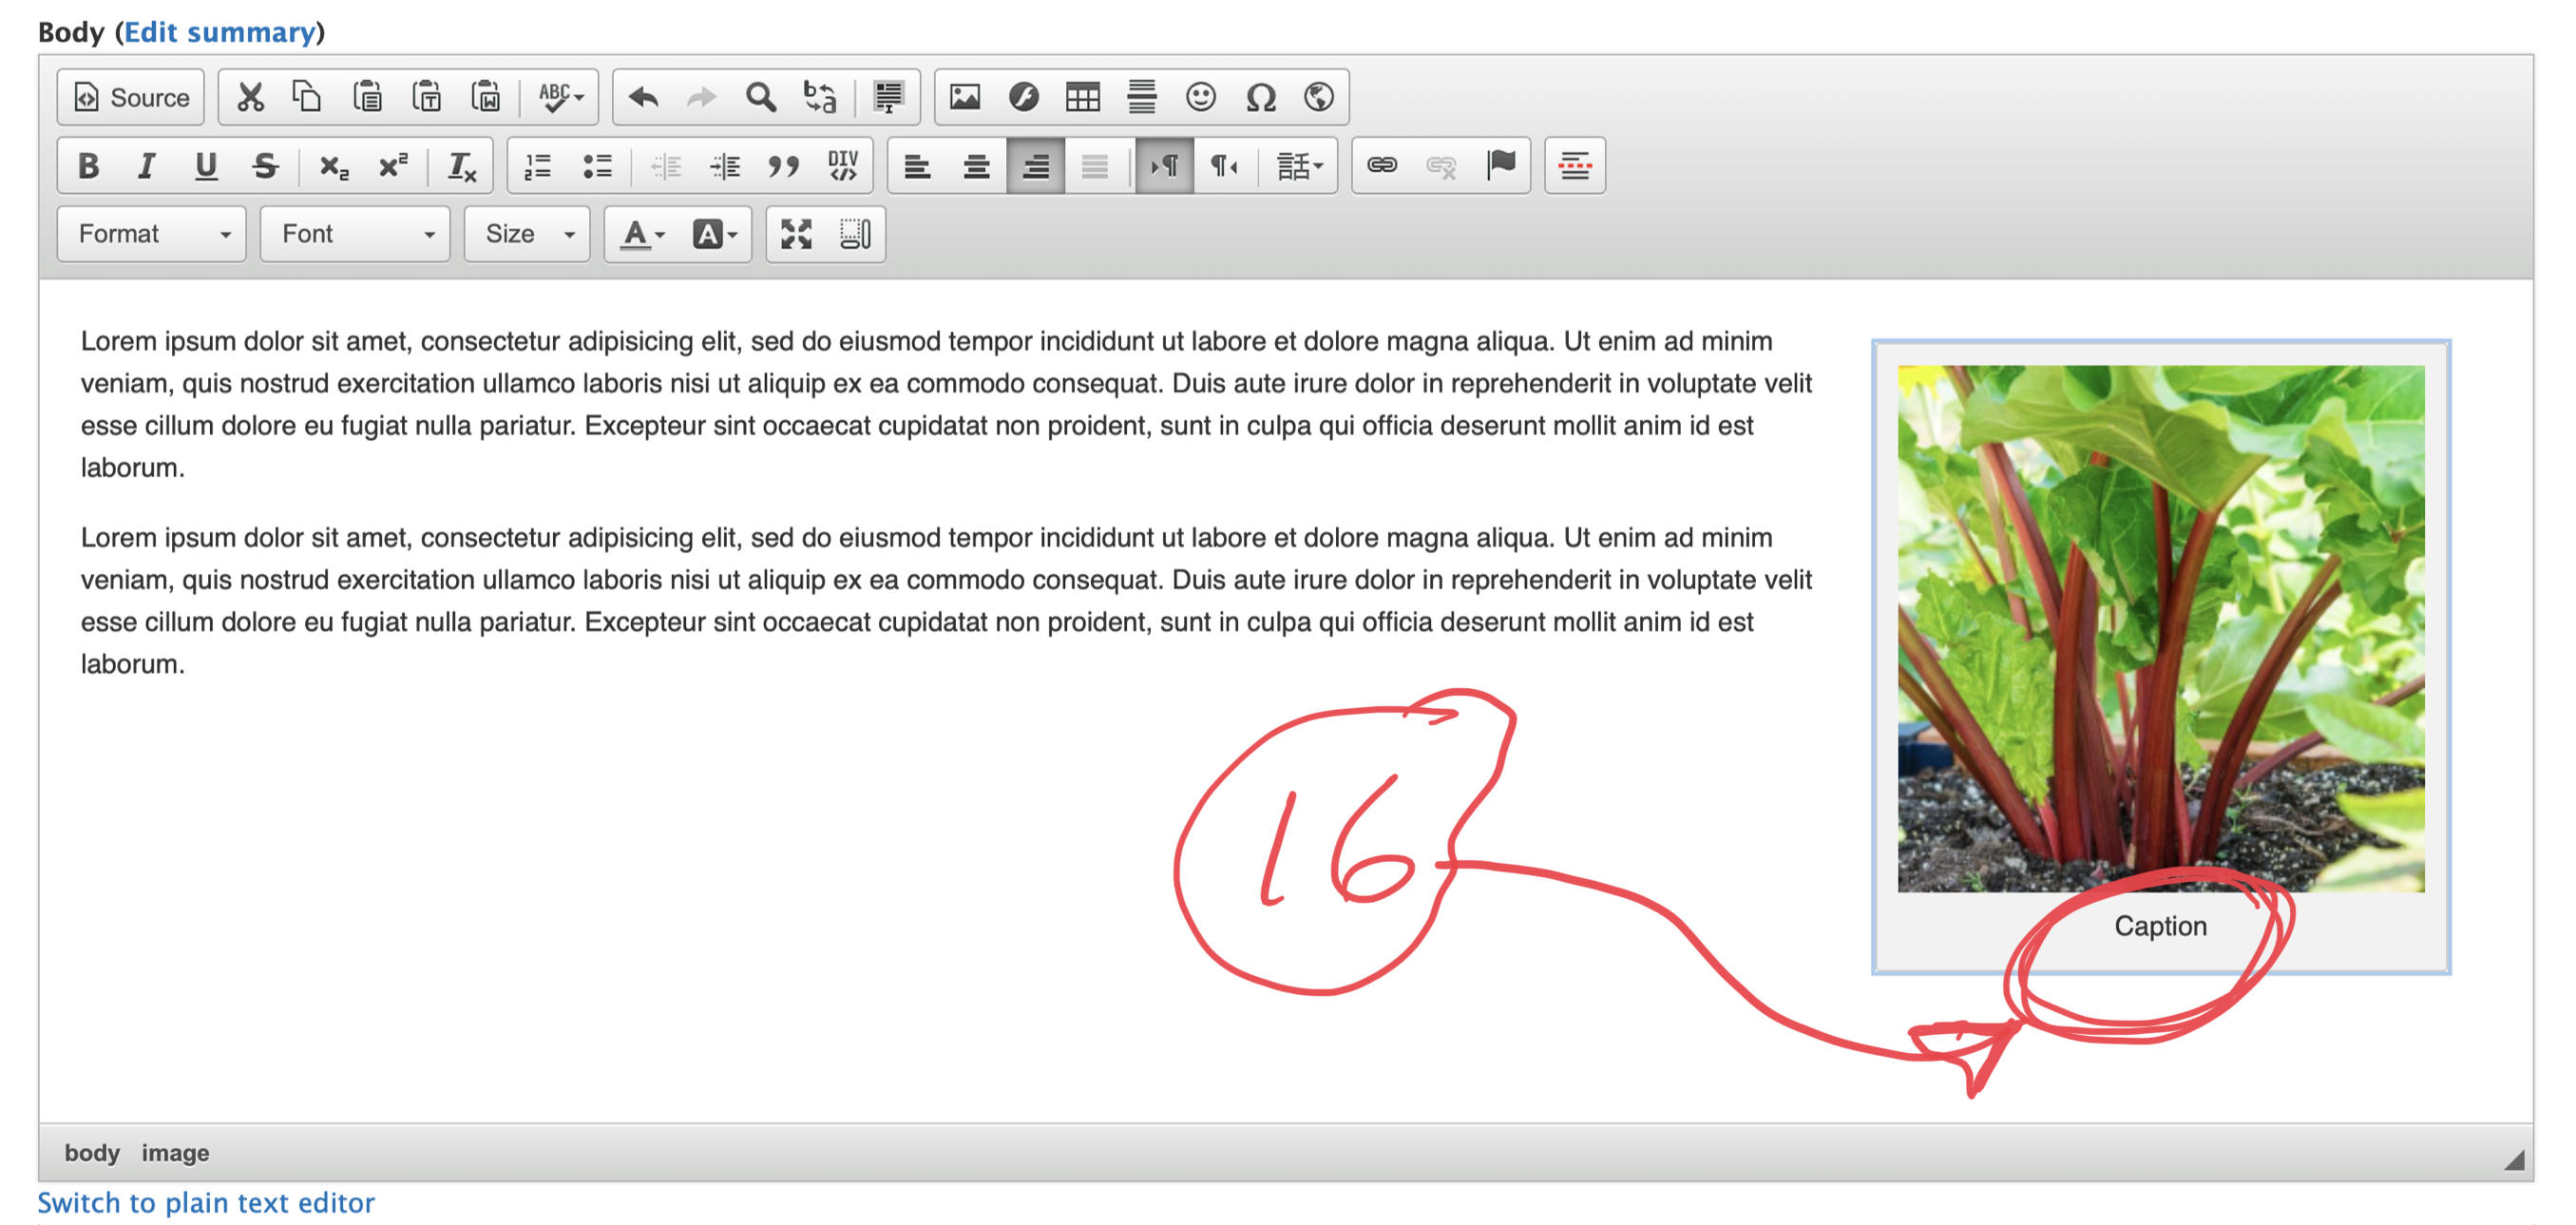
And here we are back in the with our image inserted. One more step, though. Either add a new caption to the image or delete the word caption (#16).
DON’T FORGET TO SAVE!

And here is the finished product. Note the space between the image and the text.