Tag: FactSheet

The Care of Lilacs

from The Frelinghuysen Arboretum

Culture

_MG_7174-th

Lilacs grow best in full sun and well-drained soil. They prefer neutral soil with a pH range of 6-7. Many soils in the northern New Jersey area tend to be on the acidic side so lilacs may benefit from a handful of ground of limestone applied every other year. Lilacs also benefit from a spring application of fertilizer. Use an all-purpose, granular fertilizer such as 5-10-5 or 10-10-10 and follow the directions on the package. Do not use a high nitrogen (lawn) type fertilizer as it inhibits flower bud formation. Water your plant well after fertilizing. Lilacs resent competition from other plants, so keep the base well weeded and cut back other plants that may be crowding out your lilac. Two to three inches of mulch at the base of the plant will keep down weeds and hold in moisture. While lilacs are a tough and long-lived plant, they appreciate regular watering during a dry spell or drought.

Planting

Select a sunny site with well-drained soil in an open area. Lilacs need good air circulation. Dig a hole 3X the width of the pot or ball of the plant. If you have a very small plant, be sure the hole is at least 18″ across. Amend the soil with well rotted compost, a cup of lime and some fertilizer. Firm the amended soil to remove excessive air pockets. Place the top of the lilac ball slightly higher than the surrounding ground and firm more soil over and around the roots. Water well. Mulch applied to the base of the transplant helps keep the soil moist. Water your lilac twice a week for the first month, unless there are regular rains. Keep lilac well watered throughout first growing season.

Pruning

Pruning is best done in late March or early April, before the leaves have emerged. Healthy lilacs only need occasional pruning to remove dead or spindly branches. Older, taller plants will benefit by pruning out, at the base, up to one-quarter of the largest branches. Pruning forces new growth to emerge at the base and opens up the plant to more air circulation and light. It also keeps the flowers at eye level. Very old and overgrown lilacs sometimes need total rejuvenation. This may be accomplished by removing one-quarter of the oldest branches each year for four years. If your lilac produces too many suckers at the base, prune or dig out the excess. Suckers with good root systems may be potted up and given to friends or planted in another location in your garden.

Diseases and Pests

Lilacs in our area suffer from three types of problems. The most common disease is powdery mildew that coats leaves in late summer and fall with a silvery-white film. This disease rarely harms a healthy plant, but may look unsightly. The Common Lilac (Syringa vulgaris) and its cultivars are most susceptible to this disease. This problem may be treated with a fungicide or wettable sulfur. For best result follow the instructions on the product. Another common problem is lilac borer. This small, white larva bores into the heartwood of the lilac eventually weakening or killing the cane. It leaves a small pile of sawdust coming out of the entry hole. The best prevention is to prune out the largest, oldest growth and encourage vigorous new growth. The borer does not seem to attack young growth. Borers may be killed with a long wire put into the hole. The third problem lilacs encounter is oyster-shell scale. This tiny pest can rapidly cover lilac canes, weakening and even killing the cane or the entire plant. The pest is light brown or gray and may blend with the bark from a distance. Badly infested branches should be removed and destroyed. Spray with dormant oil in early spring before bud break or with summer oil or Malathion after the leaves emerge. Follow directions.
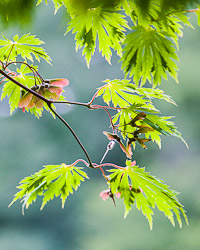
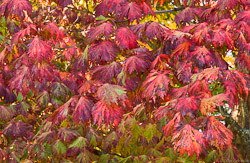
Japanese Maples – Acer palmatum

_MG_6095
Acer palmatum in Spring

While the delicate beauty and splendid colors of Japanese Maples have delighted Western gardeners for almost two centuries, they have been revered in the East for over thirteen centuries. Native to Japan, China and Korea these trees do best in light shade and do not like to be dried out. Plant them in soil that has a fairly high content of organic matter and is moist, but well drained. Older, established plants can take some drought. Full sun and winds may burn the leaves, especially the variegated varieties. Most Japanese maples are hardy to Zone 5.

  • Acer palmatum var. atropurpureum (aka Atropurpureum) – Reddish purple 5-7 lobed leaves, especially in spring, which fades in the summer heat but shows excellent spring and fall color. Seedlings produced from a good selection will show all varieties of coloration. May grow 30-40 in height.
  • Acer palmatum Butterfly – One of the older, but still popular, garden tested variegated forms with emerging leaves green with pink margins, maturing to gray green with cream-colored variegation. Fall color is rose-red to purple-red. Habit is upright, vase shaped 12-15 high by 6-8 wide, relatively slow growing.
  • Acer palmatum Fireglow – This plant keeps a good red color all season long. The fall color is particularly showy. It has a very upright growth habit and has bronzy red stems.
  • Acer palmatum Glowing Embers – This is a Michael Dirr selection, exceedingly vigorous with small dark green leaves that turn orange-red-purple in fall. Its a fast growing, heat tolerant plant, often growing to 30.
IMG_5177
Acer palmatum in Fall
  • Acer palmatum Karasugawa – The most outstanding feature of this cultivar is its bright pink new growth. Some leaves are almost entirely white with pink edges while others are mostly pink with tiny flecks of white or bright green. As the season matures, the leaves get greener but still retain some pinks and whites. This is not a vigorous grower and it is somewhat tender. The plant rarely grows higher than 6-9.
  • Acer palmatum Katsura – This is a dwarf form with leaves that emerge a soft yellow orange with deeper orange margins. As the season progresses the leaves turn a rich green and then bright yellow or orange in fall. It grows to about 5 feet tall at maturity. This variety makes a good bonsai.
  • Acer palmatum Okushimo – An upright vase shaped tree that may grow to 24 or more at maturity. Its leaves are an unusual shape, deeply lobed and almost tube shaped. The fall color is an intense gold.
  • Acer palmatum Oregon Sunset – This plant exhibits a good rounded habit and has leaves that emerge very red in spring. As the season progresses, the leaves fade to a bronzy red then turn a fiery red in fall.
  • Acer palmatum Oshi Beni – The new growth emerges a vibrant orange-red to red, but loses this color in late spring, becoming bronze to greenish red. Fall color is rich scarlet. The plant will grow 15-20 and develops a spreading habit.
  • Acer palmatum Red Pygmy – This is one of the cultivars of linearilobum group, with red or bright maroon leaves that are 7 lobed with long strap-like divisions. This tree grows about to 6 by 6. This is an excellent cultivar for a very small garden. The new growth is not always typical, so do not prune out unusual growth as it reverts to normal during its second season.
  • Acer palmatum Sango Kaku – A common cultivar praised for the brilliant coral fall and winter color of the young stems. The color is very striking, but is lost as the bark matures. New leaves are tinged reddish but turn a light green for the summer. Fall color is gold with some reddish tints. The tree will grow 20-25 high by 18-22 feet wide. It is not as heat tolerant as some other cultivars.
  • Acer palmatum Trompenburg – The leaves are deeply cut creating a lacy look. The foliage is deep purple and persists into summer then it changes to a reddish green. Fall color is red to crimson. The plant grows 13-16 high by 10-13 wide.
  • Acer palmatum Versicolor – This is one of the most popular cultivars that will grow up to 25 on 25 to 40 years. Leaves are deep green in color with a varied pattern of markings of colors of white and occasionally pink.
  • Acer palmatum var. dissectum – Cut-leaf Maple. The most refined of all maples with leaves of 7, 9 or 11 lobes cut to the point of attachment of each lobe and each lobe is finely toothed. Seedlings exhibit a variety of variation. Plant may only grow 10-12 tall by 20 wide. Old specimens have a remarkable branching structure that cascades.
  • Acer palmatum var. dissectum Red Feather – A dwarf plant with extremely lacy, small, fine leaves. The leaves emerge in spring with a reddish color that fades during the summer. Fall color is a beautiful crimson red.
  • Acer palmatum var. dissectum atropurpureum “Inaba Shidare – (leaves of rice plant) On outstanding dissectum form with lobes up to 10 cm long. The leaves emerge a deep purple red and retain this color all season. Fall color is a brilliant purple red or crimson red.
  • Acer palmatum var. dissectum Seiryu – The only upright form of the dissectum group. The foliage is bright green, which turns strong gold in the fall with reddish tints. Plants may grow up to 20 feet in height.
  • Acer palmatum var. dissectum Viridis – This is a catch all term for all green leaf dissected types. Fall color is yellow gold to red. The plant may grow as large and wide as the straight species.
  • Acer palmatum var. dissectum Waterfall – This beautiful selection with extremely cascading branches is considered the best of the green leaf dissected forms. The foliage is a rich green all summer long and turns gold with reddish undertones in fall. This cultivar was discovered as a chance seedling at Willowwood Arboretum. The original plant is by the pond near the house.

Perennials For Fall

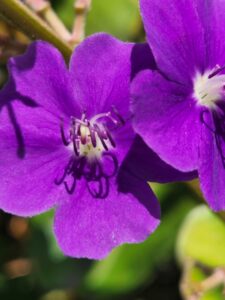
Tibouchina

Fall is a spendid time in the garden where many varieties display shapes and colors that rival the better-known maple varieties. When planning your garden, think about a number of these plants showing which show blossoms and foliar color from August through November.

The plants in the following table may all be seen at the Frelinghuysen Arboretum.

Table of Fall Perennials

Botanical Name Common Name Bloom Time Color Height
Aconitum x arendsii Monkshood Oct-Nov Purple-blue 6′
Allium senescen Allium Sept Lavender 12″
Allium thunbergii ‘Ozawa’ Flowering Onion Oct-Nov Pink, White 6-12″
Anemone x ‘Bressingham Glow’ Japanese Anemone Sept-Oct Pink 2-4′
Anemone tomentosa ‘Robustissima Japanese Anemone Aug –Sept Pink 2-4′
Aster x frikartii Aster July-Sept Lavender 2-3′
Aster novae-angliae New England Aster Sept-Oct Mixed 3-6′
Aster tartaricus Tartar Aster Oct-Nov Lavender 4-6′
Begonia grandis Hardy Begonia Sept Pink, White 2-3′
Calluna vulgaris Heather Aug-Nov Pink, Red, White 2′
Chelone lyonii Turtlehead Aug-Sept Pink, White 3-4′
Chrysanthemum x morifolium Garden Mum Aug-Nov Various 2-4′
Chrysanthemum articu Artic Daisy Oct White 2-3′
Cimicifuga ramosa ‘Atropurpurea’ Bugban Sept White 5-8′
Echinacea purpurea Purple Cone Flower July-Oct Purple-pink, White 2-3′
Eupatorium coelestinum Hardy Ageratum Sept-Oct Blue 2′
Gentiana asclepiadea Gentian Sept Blue 1-2′
Gentiana septemfida Gentian Sept Blue 1-2′
Kirengeshoma palmate Kirengeshoma Aug-Sept Yellow 2-3′
Physostegia virginiana Obedience Plant Aug-Oct Pink, White 2-3′
Sedum spectabil Stonecrop September Pink 2-3′
Sedum x ‘Autumn Joy’ Stonecrop Aug-Oct Pink to Red 2-3′
Sedum x ‘Ruby Glow’ Stonecrop Aug-Oct Pink to Red 1′
Tricyrtis hirta ‘Alba’ Toad Lily Sept-Oct White, Lavender 2-3′
Vernonia noveboracensis New York Ironweed Sept Purple 5-7′

Getting Started with Cannas

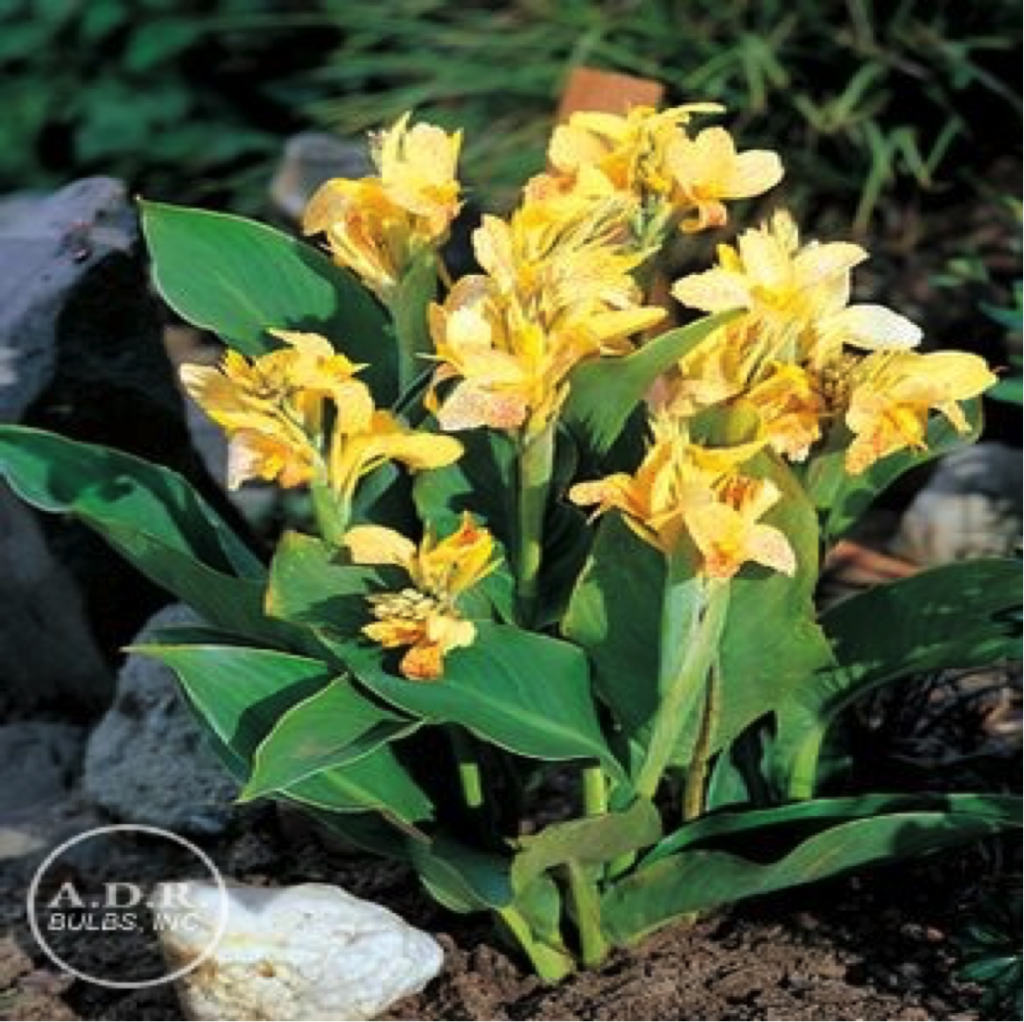
Canna Yellow King Humbert

Yes, you can – grow Cannas!

Cannas are tuberous plants with colorful tropical looking foliage and brilliant, lily-like flowers. The leaves may be green, yellow, purple or multi-colored with stripes, marginal markings or blotches. The flowers come in colors of white to ivory to shades of yellow, orange, pale to deep pink, apricot, coral, salmon and a variety of reds.

Their common name is Indian-Shot. This refers to the plant’s black, very hard seed, which resembles the shot or pellets in shotgun cartridges. Cannas come from tropical and subtropical areas of the Americas and Asia. They are easy to grow, both in the ground or in containers. They can be grown from seed or by saving the tubers from year to year. The leaves may be used in flower arrangements. The flowers only last a day to two, so, do not make good cut flowers.

There are three main types of cannas: lower growing and dwarf varieties include the French or Crozy cannas which grow 3-4 feet tall, with large flower trusses; the Pfitzer Dwarf cannas from Germany, which grow 2 feet to 3 feet tall; and the Seven Dwarfs series which only reach about 18 inches. The Italian, or orchid-flowered cannas, are tall 4-5 feet, and the flower segments are more open and spreading than the French cannas. The third group includes all the other cannas, most of which are the tall, 5-6 feet, old-fashioned varieties with smaller flowers and large leaves.

Because of their tropical look and lush foliage, cannas look great when planted against a plain background and in groups of a single color. They make striking poolside plantings and look great around or in containers on terraces, patios or decks. They are great mixed with hot colors in a perennial border. They go well with tall grasses. Cannas bloom continuously and look good all summer, even through the dog days of August.

Cannas were used extensively in the Victorian era as they lend themselves well to bedding out schemes and formal gardens. For a taste of this type of planting go to Skylands in Ringwood in August or September and look at their annual garden. It is very Victorian. More recently bedding out schemes had lost favor as had bold colors and tropical foliage. The style of 30 to 10 years ago was cool colors, pastels and perennial borders. The pendulum has swung back the other way now, and bold colors, foliage and the tropical look are back in. These combinations are being used in a more informal manor and usually thickly planted for a lush look.

Although cannas may be grown from seed, usually the seed will be mixed colors and sizes, so what you get may not be what you want. Seeds may be started in early spring. Nick the seeds with a file or knife or soak in warm water overnight to hasten germination. Plants need to receive good light and may be planted outside in late May.

If you buy rootstock, you will be assured of getting what you want both in size and color. Rootstock may be started indoors in early April for a late May planting. Start in flats or pots with bottom heat and keep them warm until they sprout. Afterwards supply them with good light for strong growth. Or plant them outside in the spring. Cannas are hardy to Zone 7, so they can take some cold. Here at the Arboretum, we often plant them outdoors in early May. They usually take a few weeks to really come up but the root system is establishing itself during that time. Plant them 4-6 inches deep, 10-24 inches apart (depending on cultivar).

Cannas love rich lose soil with all the fertilizer you can give them and as much heat and sun as possible. Keep them well watered at all times. Pick off faded flowers to prevent seed production and when the stalk has finished blooming, cut it down completely to the ground.

If you live in Zone 7 (shore) or plant you canna right by the foundation of the house, it will be hardy outdoors. If you have a lot of rootstock available, you might try leaving some in the ground over winter and mulching heavily. Some cultivars are reported to be more hardy than others. Otherwise, you must dig them up in fall, after a frost has hit. Lift them out of the ground with a fork and shake off the soil. Leave them outdoors for a day to two if possible to dry off. Store the rootstock in brown paper bags, open cardboard boxes or burlap in a cool, but not freezing place. An unheated attached garage or cool basement works well. At the Arboretum, we store ours in a cool hoop house still in their containers and watered occasionally. Others are stored out of a pot in a cool cellar. Check the roots occasionally to make sure they are not drying out too much. Spray a little water on them from time to time if needed. The next spring bring out the rootstock, and divide as needed. Leave at least three eyes to a division and more if you like. Container grown ones should only be a small division, especially if you plan to plant something else in the container.

Cannas do well as a single item in a container or may be combined with other tender annuals. Be sure to pick items of approximately the same size as cannas grow quickly and can easily overwhelm other plants in the containers. Perhaps you will choose to use tall, fast growing coleus as a foil in the containers.

Cannas have few pests or disease problems. Occasionally European Corn Borer may attack the stalks in last summer or early spring. The larva is pink, 0.75 to 1 inch long; the egg-laying moth is yellow-brown and nocturnal, thus hard to spot. If you find this borer, kill it, and try to get the larva out of the stalks. But Japanese Beetles will often be attracted to Cannas in July. The adults the congregate on the leaves, mating and feeding. Every evening go outside and had pick them off. Remove badly damaged foliage. Most sprays do not work well on Japanese beetles.

When planting in containers, use Pro-Mix, mixed with compost, Osmocote and one of the water absorbing products on the market. Cannas are very thirsty and quickly dry out. By using this substance, you will be able to water every other day. The Osmocote provides time-released fertilization all season long.

Good luck with your Cannas!

Creating a Butterfly Habitat

The most important things to remember when planning & planting a garden to attract and sustain butterflies:

  • Include nectar flowers for butterflies and larval food for caterpillars
  • Include pebbles or stones for butterflies to stand upon and bask in the sun
  • Dig mud puddles or include shallow dishes filled with mud for puddling
  • NEVER USE PESTICIDES
  • Place a bench in the garden for you to enjoy the butterflies

All butterflies go through four distinct life stages: egg, larva, pupa and adult. Everyone is familiar the adult stage, when the insect is the most attractive, but this phase only last two to three weeks. During that brief period, they must find a suitable mate, reproduce, seek out food and shelter, and avoid being eaten – a tall order for most creatures. To meet these high energy demands, adults rely on high energy nectar for fuel.

Good nectar plants include:

Anise Hyssop*Agastache foeniculum
Black-eyed Susan*Rudbeckia hirta & R. fulgida
Blanket Flower*Gaillardia spp.
Blazing Star*Liatris spp.
Blue Mist ShrubCaryopteris x clandonensis
Boneset*Eupatorium perfoliatum
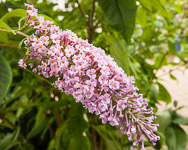
Butterfly BushBuddleia davidii
Butterflyweed*Asclepias tuberosa
Button Bush*Cephalanthus occidentalis
Coreopsis*Coreopsis spp.
Culver’s Root*Veroniacastrum virginicum
Garden Phlox*Phlox paniculata
Garden SageSalvia spp.
Goldenrod*Solidago spp
Iron Weed*Vernonia novaboracensis
Joe-pye Weed*Eupatorium maculatum
Milkweed*Asclepias spp.
Mountain Mint*Pycnanthemum muticum
New England Aster*Aster novae-angliae
Purple Coneflower*Echinacea purpurea
Sneezeweed*Helenium autumnale
Sunflower*Helianthus spp.
Sweet Pepperbush*Clethra alnifolia
Turtlehead*Chelone lyonii or C. glabra
Weeping Lantana Lantana montevidensis
White Meadowsweet*Spiraea alba
Wild Bergamont*Monarda spp.
*These plants are native to the United States

As rapid development continues, butterfly populations are on the decline because their food sources and habitats are being destroyed. Help butterflies survive by avoiding manicured grass lawns, pesticides and foreign species of plants in your yard and garden. If you have room, leave part of your garden become a meadow. Initially you will want to plant in plugs of native wildflowers and native grasses. Mowing is needed only once a year in late November. You may have to remove an occasional unwanted plant. By using native plants, you are providing food sources for the beautiful creatures

It is also important to include larval-host plants. Remember these plants are supposed to be eaten by the caterpillars, so if they show insect damage, don’t reach for the pesticides.

Below is a partial list of good food sources for caterpillars:

Eastern Red Cedar*Juniperus virginiana
FennelFoeniculum vulgare
Hackberry*Celtis occidentalis
Milkweed*Asclepias spp
ParsleyPetroselinum crispum
Pearly EverlastingAnaphalis margaritacea
Sassafras Tree*Sassafras albidum
Spicebush*Lindera benzoin
Willow*Salix spp.
Violets*Viola spp.
Agastache foeniculumAnise Hyssop
Amorpha brachycarpaLead Plant
Aquilegia canadensisWild Columbine
Asclepias incarnataSwamp Milkweed
Asclepias tuberosaButterfly Flower
Aster divaricatrusWhite Wood Aster
Aster nova-angliaeNew England Aster
Cephalanthus occidentalisButton Bush
Chelone glabraWhite Turtlehead
Chelone lyoniiPink Turtlehead
Clethra alnifoliaSweet Pepperbush
Coreopsis verticillataLance-leaf Tickseed
Echinacea purpureaPurple Coneflower
Eupatorium purpureumJoe Pye Weed
Eupatoriutm perfoliatumWhite Boneset
Gaillardia pulchellaBlanketflower
Geranium maculatumWild Cranesbill
Helinium autumnaleSneezeweed
Juniperus virginianaEastern Red Cedar
Kalmia latifoliaMountain Laurel
Liatris spicataBlazing Star
Lindera benzoinSpicebush
Lonicera sempervirensTrumpet Honeysuckle
Magnolia virginianaSweetbay Magnolia
Monarda didymaOswego Tea or Bee Balm
Opuntia humifusaPrickly Pear
Pinus virginianaJersey Pine
Phlox stoloniferaCreeping Phlox
Prunus virginianaChoke Cherry
Pycnanthemum muticumMountain Mint
Rhododendron periclymenoidesPinxter Azalea
Rhododendron viscosumSwamp Azalea
Rudbeckia fulgidaOrange Coneflower
Rudbeckia hirtaBlack-Eyed Susan
Sedum ternatumShale Barrens Sedum
Solidago spp.Goldenrod
Vernonia novaboriensisNew York Ironweed
Yucca filamentosaAdam’s Needle

A Quick Course in Pruning Conifers

Pruning conifers or needled evergreens incorrectly can be disastrous to the appearance and health of your trees. To understand how evergreens should be pruned, you must know how and where they produce new growth. Needled evergreens fall into two basic groups which are determined by their branching pattern; whorl-branched and non-whorled or random branching.

Whorl-branched conifers branch only once a year when new growth occurs in the spring. This results in a whorled growth of branches at the growing tip. In this group, new growth comes from buds at the tips of the branches, buds along the new growth, and from buds at the base of the new growth. Evergreens that fall into this group should not be cut back beyond where there is green growth (or beyond the last whorl) because there are no latent or dormant buds in the bare old wood. If pruned back beyond this point, there will almost certainly be no regrowth on the branch and it will remain a bare stick.

Whorl-branched conifers include: Abies (Fir); Cedrus (Cedar); Cryptomeria; Larix (Larch); Picea (Spruce); Pinus (Pine)

Random branching conifers produce new growth from buds at the tips of the branches and also from buds that are randomly located along the stems. These evergreens have dormant buds and foliage further back on the stem than the whorled branched species. The result is that this group can be cut back harder and still break into new growth. Still, to be safe, you should not cut back beyond where there is green growth.

Non-whorled or random branching conifers include: Chamaecyparus (False cypress); Cupressus (Cypress); Cupressocyparis leylandii (Leyland Cypress); Tsuga (Hemlock); Juniperus (Juniper);Thuja (Arborvitae).

How to Prune Whorl-branched Conifers

These evergreens have a naturally beautiful shape and normally, they require little pruning. Care should be taken when a species or cultivar is chosen to select one that will not outgrow the space you plant it in. Growth can be controlled by pruning if you start when the plant is young. If you wait until the tree has outgrown its space, it will be too late to shorten the growth and have the plant look natural.

The new growing tips on whorl-branched evergreens are called candles. You can control the growth of your tree by pruning the candles. If you want to slow the growth a little but still want it to get bigger, remove about 1/2 to 1/3 of the candle when it has elongated to 2″-4″ usually in mid to late spring or early summer. If you want the tree to remain the same size, remove the entire candle when it gets to be about an inch long.

Other selective pruning should be done in early spring so that the cut ends will heal quicker. Dormant buds behind the cuts will begin to grow and will hide the cut ends.

If pruning is done too late, these buds will remain dormant and no new growth will occur to hide the cut ends. Never cut back into bare stems. Always cut back to a side branch or a dormant bud so you will get regrowth.

How to Prune Random Branching Conifers

These evergreens can tolerate more pruning than the whorl-branched group because they have more dormant buds along the stem. Pruning cuts can be made almost anywhere along the stem except into bare wood. Pruning to maintain shape is best done in early spring so the new growth covers the cut ends. Selective hand pruning rather than shearing creates a more natural shape. Prune to remove wayward branches in early spring. Cut back to a side branch. To prune to maintain size shear the new growth in summer once the tree or shrub has stopped growing. For prostrate or open growing plants, it is often better to selectively prune individual branches rather than shearing the whole plant.

Keep in mind that for both of these types of conifers, dead, diseased, or damaged branches should be removed as soon as they are noticed regardless of the time of the year. When removing diseased portions, be sure to disinfect shears with a 10% bleach solution between cuts.

To avoid winter damage, do not prune evergreens in late summer or early fall. The tender new growth that forms will not have time to harden off before cold weather sets in and will freeze and turn brown.